
ආයුබොවන්, හැමෝටම. ඔන්න තවත් අලුත් දෙයක් අරන් ආවා. ගොඩක් දෙනෙක්ට කියෙන ප්රශ්ණයක් තමයි Facebook එකේ සිදුව තිබෙන අලුත් Update එක නිසාවෙන්, TimeLine නමින් හදුන්වන අලුත් Layout එක ලබා ගැනීම. ඒ වගේම එය ඉවත් කල නොහැකි වීම. ගොඩක් දෙනෙක් මේ ප්රශ්ණය අහනවා. එහෙත් සාර්ථක ක්රමයක් මම මෙයිට කලින් දැක්කෙ නැහැ. ඒත් මේ වන විට එයට විසදුම් සොයාගෙන තිබෙනවා. ඇත්තටම මේ අලුත් TimeLine එක Microsoft සදාගමේ Internet Explore 7 සහ, එයට කලින් Version සදහා සහය නොදක්වයි. ඒ නිසා ඒ වගේ පරණ Version එකක් භාවිත කරන අයෙකුට තාමත් දකින්න ලැබෙන්නෙ Clasic View එක. අපි විසින් භාවිත කරන Web Browser වලට විවිද Extension සහ, විවිද වෙනස්කම් සිදුකමින්. නැවතත් පරණ Clasic View එකම ලබා ගන්න පුළුවන්, අපි බලමු දැම් මේක කරන විදිහ.
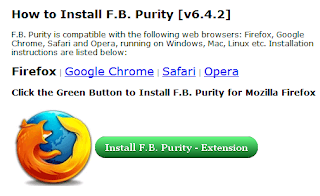
Firefox සහදා TimeLine Disable කරමු.
මේ සදහා අපි අපේ Web Browser එකට User Agent Switcher Install කරගත යුතු වෙනවා. මෙතන ක්ලික් කරලා එය Download කරගෙන Browser එකට Install කරගන්න.දැන් ඔබේ Web Browser එක Restart කරන්න. Firefox Browser එකෙහි Navigate Bar එකෙහි තිබෙන Tools>> Default User Agent>> Internet Explorer Menu එකට යන්න, අහි Internet Explore 7 Option එක තොරන්න.
සැ. යු -: Browser එකෙහි Navigate Bar එක නොමැති නම්. එය ලබා ගත යුතියි. ඒ සදහා Browser එකෙහි තිබෙන Firefox Button එක ක්ලික් කරන්න, පසුව Option යන්න, එහි Menu bar තොරන්න.

දැන් ඔබේ Facebook Account එකට Log වෙන්න, ඔයාට පරණ Clasic View එක ගන්න පුළුවන්, එහෙත් ඔබට මෙයි සුදු පාට හිස් ඉඩක් පේන්න තියෙනවා ඇති. එහෙනම් එයත් ඉවත් කරමු.
මේ සදහා අපි තවත් Add-on එකක් භාවිත කල යුතුව තිබෙනවා. මෙම ලින්ක් එකට යන්න, එහි තිබෙන Add-on එක ඔබේ Browser එකට යොදාගන්න. පසුව Browser එක Restart කරලා Facebook Log වෙලා බල්නන, ඔබට පරණ විදිහටම Facebook දකින්න පුළුවන්.
Google Chrome සදහා TimeLine Disable කරමු.
මේ ක්රියාවලිය සාර්ථක කරගැනීම සදහා, ඔබ දැනට භාවිත කරන Google Chrome Browser එකෙහි, Browser History සම්පූර්ණයෙන් මකා දැමිය යුතුයි. ඒ සදහා Browser එක Open කරගෙන, Ctrl + Shift + Delete බට්න් තුන එකවර ඔබන්න, පසුව පහල ආකාරයේ Window එකක් දක්නට ලැබෙයි.

මෙහි සියළුම Option සදහා හරි ලකුන හොදන්න. පසුව Clear Browsing Data බට්න් එක ක්ලික් කරන්න. දැන් Browser එක Close කර ගන්න.
ඔබේ Desktop එක මත තිබෙන Google Chrome Browser එහෙහි Shortcut එක උඩ Right Click කර, Properties යන්න. එවිට පහත අකාරයේ Window එකක් දක්නට ලැබෙයි.

මෙහිTarget එක විදිහට, )C:\Users\your-username\AppData\Local\Google\Chrome\Application\chrome.exe) දකින්න පුළුවන්, Facebook TimeLine එක කලින් විදිහටම ගන්න නම්, අපි කරන්න ඕනෙ මෙතන තනත් අලුත් Code එකක් ලබා දීමයි. එය ඔබේ OS එක අනුව පහතින් තෝරාගෙන යොදාගෙන Ok කරන්න.
Windows Vista and Windows 7
--user-agent="Mozilla/4.0 (compatible; MSIE 7.0; Windows NT 6.0)"
Windows XP users
--user-agent="Mozilla/4.0 (compatible; MSIE 7.0; Windows NT 5.1)"
කෝඩ් එක යොදාගැනීමෙන් අනතුරුව ඔබට එහ පහත විදිහට සම්පූර්ණ වශයෙන් දිස් විය යුතියි
C:\Users\your-username\AppData\Local\Google\Chrome\Application\chrome.exe --user-agent="Mozilla/4.0 (compatible; MSIE 7.0; Windows NT 6.0)"
සැ. යු -: මෙහිදී අපි භාවිත කරන Code එක, ඔබේ Shortcut එකෙහි Target යටතෙහි තිබෙන Path එක යටතට ලබා දීමේදී Path එක අවසානයේ තිබෙන Chrome.exe යන්නට පසුව Space එකක් තියන්න. පසුව ඉහලින් ලබා දී තිබෙන Code එක යොදාගන්න.
මෙයි සිදු කරගැනීමෙන් අනතුරුව. Google Chrome බාවිතයෙන් Facebook Log වෙලා බලන්න, එහිදී ඔබට TimeLine එක නැතිව පරණි ආකාරයට දකින්න පුළුවන්, එහෙත් Profile එකෙහි හිස් ඉඩක් දකින්න පුළුවන්, එයට සිසදුම් විදිහට, Firefox සදහා භාවිත කල Add-on එහෙති Google Chrome සදහා වූ Version එක භාවිත කල හැකිය. එය පහල පිංතූරය උඩ ක්ලික් කර Download කරගෙන Install
Safari සදහා TimeLine Disable කරමු.අපි හැමෝම එකම Web Browser එක භාවිත කරන්නෙ නැහැනෙ, එක එක අය එක එක Browser පාවිච්චි කරනවා. ඒ එයාලගෙ කැමැත්ත අනුව, ඒ නිසා අපි අතරෙ මම වගේ තවත් Safari browser එක පාච්ච්චි කරන අය ඇතිනෙ. එහෙනම් එයාලටත් මේක කරගන්න විදිහ බලමු.
01) මුලින්ම Browser එක Open කරගන්න. (ඔබ සතුන අලුත්ම Version එකක් තිබිය යුතුයි)
01) Alt බට්න් එක ඔබන්න, එහි තිබෙන Develop Menu එකට යන්න.
03) මෙහි තිබෙන User Agent වල තිබෙන Internet Explorer 7.0 යන්න තොරන්න.
04) මෙය භාවිත කලත් ඔබට අනෙකුත් Browser වල විදිහටම සුදු පාට හිස් ඉඩක් ලැබෙනු ඇත. එය ඉවත් කීරීමට පහත Add-on එක Install කරගන්න.බොහෝ දෙනෙක් භාවිත කරන්න Web Browser සදහා TimeLine එක නැතිව පැරණි පෙනුම ලබාගන්නා ආකාරය පැහැදිලිව විස්ථර කලා කියලා හිතවා, ඔයාලට තේරුම් ගන්න පුළුවන් විදිහට. එහෙනම් ඔය පහල බලන්නකො. ඔය තියෙන්න Time Line එක නැතිව මගේ Profile එකේ කලින් පොනුම. හ්ම් ඔයාලත් මේ ලිපිය වැදගත් නම් අපිට පොඩි සහයෝගයක් ලබා දී යන්න. ස්තූතියි සුබ දවසක්....සැලකිය යුතුයි - මෙය Browser එකක් අදාරයෙන් සිදු කරනු ලබන ක්රියාවලියකි. ඒ නිසාවෙන්. මෙය ඇත්තටම Deactivate වීමක් සිදු නොවේ. මෙයින් කරන්නේ අපි Browser එකට යොදාගන්න Extension අදාරයෙන් පැරණි විදිහට සකස් කර ගැනීම පමණි. මේ නිසාවෙන් ඔබගේ Account එක බලය අයෙකුට TimeLine එක දැග ගැත හැකිය.


mama nam karala baluwe na machan...eth me post eka patta widiyata watinawa machan ela
ReplyDeleteme ham widiyenma mama baluwa chrome eke arama target path ekak enneth naane.
ReplyDelete@බැට් මෑන් තැන්ක්ස් මචං, කරලා බලපං, එලට වැඩ කරනවා, මම කරලා බලලා තමයි පොස්ට් එක ලිව්වෙ..elaz
ReplyDeletemachan, me wenasa karapu PC 1n natuwa wena 1kin fb log unamat thamange profile 1ta me wenasa penawada???????
ReplyDeletesry machan ara rathu patin liyala tyna සැ.යු. dakke passe ok lipiya nam ela....digatama liyanna suba pathanawa mama
ReplyDeleteah, it's ok friends
ReplyDeletechrome eka wada na target eka change karala save karaddi error message 1k enawa.firefox wada
ReplyDeletepasindu
හ්ම්, එහෙම වෙන්නෙ ඇයි කියලා ඔය උඩින් කියලා ඇති පැහැදිලිව, බලන්න යාළුවා, ඔය ඔය අලුතින් එකතු කරගත්තා නේද? Target එකට තව පොඩි Code එකක්, අන්න එතන Chrome.exe සහ අලුතින් එකතු කර ලද Code එක අතර Space එකක් තියලා, Save කරන්න....එතකොට හරි...
ReplyDeleteconceiva mezzmo pro serial crack Thanks for this post, I really found this very helpful. And blog about best time to post on cuber law is very useful.
ReplyDeleteSuch a nice and helpful piece of information. I’m so happy that you shared this helpful information with us. Please keep us up to date like this. Thanks for sharing. https://idmcracksetup.com/driverpack-solution-crack/
ReplyDeleteThank you, I’ve recently been searching for information about this subject for a long time and yours is the best I have found out so far. adaware-antivirus-pro-crack
ReplyDelete
ReplyDeleter studio crack
advanced systemcare pro crack 2
balsamiq mockups crack
voicemod pro crack
tenorshare-reiboot-pro-crack
cyberlink powerdirector crack
easeus todo backup crack
I really enjoy reading your post about this Posting. This sort of clever work and coverage! Keep up the wonderful works guys, thanks for sharing Iobit Malware Fighter Crack
ReplyDeleteSuch great and nice information about software. This site gonna help me a lot in finding and using much software. Kindly make this like of content and update us. Thanks for sharing us Cuphead Crack . Kindly click on here and visit our website and read more
ReplyDeleteVery well-written information. It will be useful to everyone who uses it, including me.
ReplyDeleteKeep up the good work - you can wait to read more posts.
avast virus definitions crack
windows 7 activator crack
driver booster crack
Its a Very Great and Amazing Blog Dear This is Very Great and Helpful..
ReplyDeleteTalha PC
Crackedithere
avast premium security crack
avid pro toolscrack
As suggested, I took your advice and found it to be constructive. Thanks for helping me out when I was struggling to reach my targets.
ReplyDeletehd video converter factory pro crack
pcmover professional crack
parashara-light crack
CyberLink audio director ultra crack is an attractive and professional software for recording and editing audio files. This program is a powerful tool to edit and record audio files most professionally. CyberLink audio director ultra crack Large and reputable CyberLink products are often among the best editing programs in the form of audio and video software, so download them safely and make sure they meet your small and large audio editing needs. CyberLink audio director ultra crack has a Visual editing tool that lets you accurately synchronize voice-overs or audio effects to specific video frames. At the same time, automated dialogue replacement helps you to align post-recorded audio with your video seamlessly. CyberLink audio director ultra crack There is no need to export your modified soundtracks and then re-import them into your video project with round-trip editing. the right sound is essential to create the right atmosphere for any video or movie. Precision audio editing for video. CyberLink audio director ultra crack
ReplyDeleteI am very impressed with your post because this post is very beneficial for me and provide a new knowledge to me. this blog has detailed information, its much more to learn from your blog post.I would like to thank you for the effort you put into writing this page.
ReplyDeleteI also hope that you will be able to check the same high-quality content later.Good work with the hard work you have done I appreciate your work thanks for sharing it. It Is very Wounder Full Post.This article is very helpful, I wondered about this amazing article.. This is very informative.
“you are doing a great job, and give us up to dated information”.
fonepaw-iphone-data-recovery-8-5-0-crack-license-key-free-download-2022/
auslogics-bitreplica-2-4-0-3-crack-serial-key-free-download-2022/
rollback-rx-pro-11-3-crack-license-key-free-download-2022/
hasleo-data-recovery-5-8-crack-license-key-free-download-2022/